


Step 1: Backup all your external SD card data to your computer. This is a very important step as in the following steps you may just mess with it and lose your data. So its better to take a backup first.
Step 2: Format your SD card.
Step 3: Make partition on your SD card using an app called AParted or you can download a desktop software called MiniTool Partition Wizard Free. For the former you need to mount your SD card back to your phone and for the later you can do it on your PC only. If you are using AParted then grant root access to AParted app.
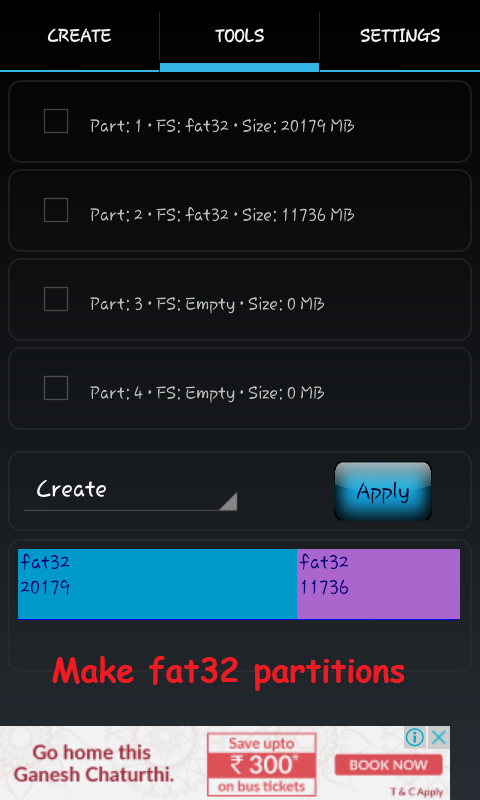
Step 4: You will have to divide your SD card into two parts. The first partition is for your media files and the second one for linking apps. Make sure that both the parts are primary and selected format should be fat32 for both of them. This is because all major devices will support partitions like this. Some of the devices won’t support moving of data files. So its better to part like this.
Step 5: Switch of your Android phone. Remove SD card and put it back.
Step 6: Turn your phone in ClockworkMod by pressing the volume up, home and power button.
Step 7: Go to mount and storage and mount the external SD card. Now reboot your phone.
Step 8: Download and install Link2SD and /system/app mover from Play Store. Grant root access to both of them.
Step 9: Go to /system/app mover and tap on Link2SD and make it a system app.
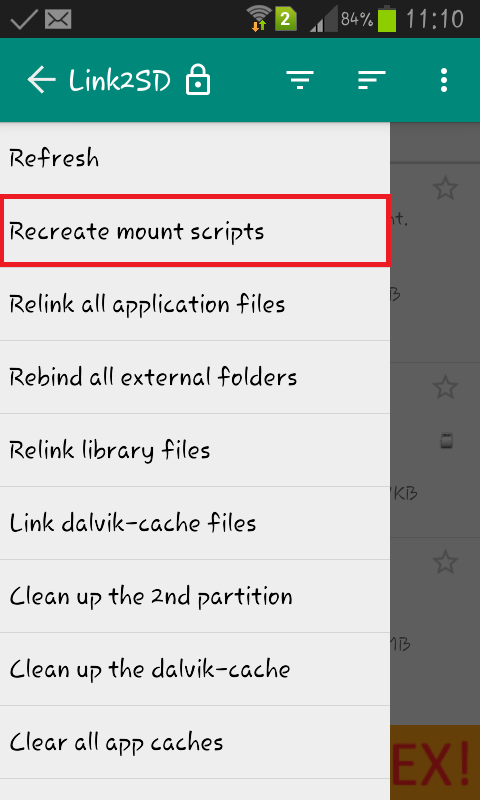
Step 10: Go to Link2SD app. From the drawer menu on the left, tap on recreate mount scripts. (You can check storage info from the right drawer menu to confirm if the 2nd part is mounted correctly).
Step 11: Select the format as fat32 and press OK to create mount scripts. Once done, you can reboot your phone.
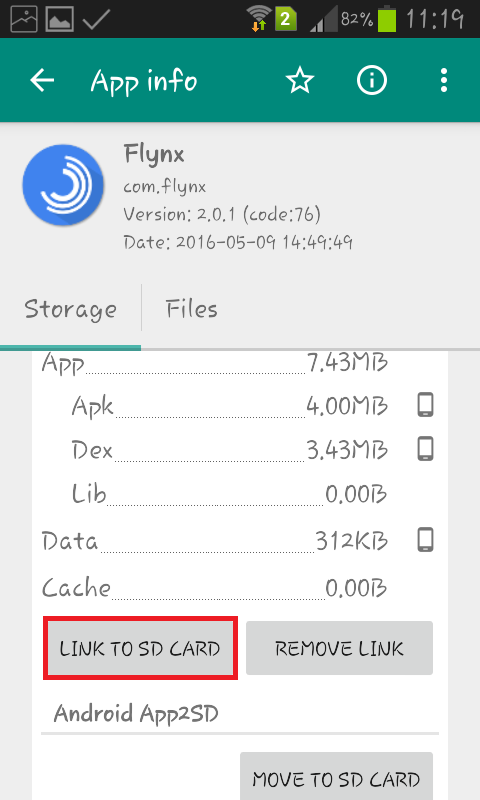
Step 12: Open Link2SD and click on any app which you want to move to SD card. From the next screen click on LINK TO SD CARD.
Step 13: Check the first three options from the next screen i.e. Link application file, dalvik-cache file, library files. You cannot link internal data files as we have selected fat32 as a format for second partition. Some phones may allow this if you have selected ext2, ext3 or ext4 format.

Step 14: Click OK. This will link the application files and move it to the second partition of your SD card. That’s it.
So basically you are linking the above three files and moving it to SD card. Now you can check your internal storage space. You will find more space there. Similarly you can link all the applications that you want to move to SD card. It is advisable that you don’t move apps offered by Google as it may create some problems.
One can also choose the “Auto Link” option from the settings on the right and move all your future apps that you download from Play Store to SD card.

