

http://googlewebmastercentral.blogspot.com/2014/08/https-as-ranking-signal.html

From a developers perspective, this is a relief. I am happy to see Google pushing HTTPS and pleased to see HTTP connections fade. Without going into why an HTTPS website is better for everyone (for those interested: privacy, consistency, and security, and more), lets examine some steps and considerations for making the switch to a secure website setup:
- Get ready
- Purchase and SSL Certificate
- Configure hosting with SSL Certificate
- Change all website links to HTTPS
- Setup 301 redirects from HTTP to HTTPS or consider HSTS
- Conclusion
Step 1. Get ready
Before laying down any money on a SSL Certificate and changing your website, consider the task as a whole.- Is Sales ready? If you run a seasonal site, making the switch to HTTPS at peak visitor times is not recommended. It is smart to expect downtime, that way if it happens you are prepared and it is during an off-time of day and sales cycle.
- Is your host ready? Before spending any money or configuring your site, make sure the host is capable of delivering an HTTPS website. For some hosts there may be some extra configuration involved and should help you with this.
- Is your team ready? Be sure to inform everyone involved in the switch that the website will be under maintenance—this includes sales teams, developers working on the site that you may need help from or will be working with, and visitors. Communication goes a long way.
- Are you ready? The process takes time and a lot of work at once. Once you start down this process of switching links and setting up redirects it might be hard to quickly reverse the whole thing and it is usually best to push forward. So, be prepared to monitor the site and be available for issues that arise. And, maybe, do not start this task on a Friday at 3 PM—it’s not that kind of task.
Step 2. Purchase an SSL Certificate
Of all the steps, this is the quickest. Usually website hosts sell SSL Certificates and will even do most of the configuring for you—Nexcess is a good example of this. About the least expensive certificate can be had for $10. Just know your websites address and the difference between www.example.com and example.com—don’t assume a standard SSL Certificate will cover both! The expensive Wild Card certificates will cover both, but probably not necessary for most setups. If you think your website may need a special type of SSL Certificate, then consult a professional company that you trust, but this is a fairly rare requirement.A quick note on the pricier SSL Certificates, particularly the “Extended” types: Some of these will make your website show up with a green lock in the address bar, see below:
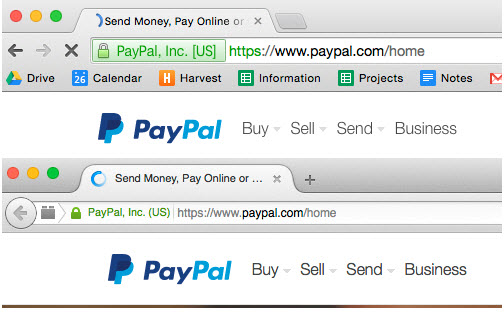
Having that green lock could boost sales in some way, but it’s tough to say. Increased sales or not, now you know why some sites show up green like that.
Step 3. Configure hosting with SSL Certificate
If your website host does not setup the SSL Certificate for you, it will be a matter of generating keys from the seller and pasting them in to the website host control panel. Be mindful of the fields and always ask Support if needed—part of your hosting costs are paying for their help in these situations.Once your website is configured properly, you will no longer see messages warning about invalid certificates when visiting HTTPS pages. You will probably need to clear your cache completely (not just use a Private Browsing window) to see these changes—when in doubt, ask someone to visit an HTTPS page of the site that has never visited the site before. Also to note, if you have not configured the actual website to be HTTPS friendly, you might get redirected back to the HTTP site. Every website host is a little different—some will have an entirely separate folder for HTTPS—so keep an open mind when getting things setup.
Step 4. Change all website links to HTTPS
Here is where all those years of hearing people say “use relative links” and “never hard-code your links!” will come into play (and now you can start saying it too and feel good about knowing why). Also, here is why using a Content Management System (CMS) will save some time as well. So, assuming your SSL Certificate is all setup…Start fixing any non-CMS generated links to how they should be:
- Find all links on the website that are not generated by a CMS. This includes links to a CDN, links to pages, images, JavaScript, or anything that your website will use.
- Change to relative link paths: If the link is “http://www.example.com/link” than it should be “/link”—this way, even if you are not quite ready to swtich everything to HTTPS, these links will still work for an HTTP website. Be sure the links start with that first “/”, otherwise you will run into issues.
- Test it out: Refresh cache on your browser and the website, then go to the page the link is on and give it a click. You can test to make sure this works on an HTTP or HTTPS website, either way will work as a test.
Change CMS generated links: This varies from platform to platform. Here is how to do it in Magento and WordPress on regular installs. If you have any cacheing plugins or extensions, it is advised to check support forums for any additional tips. For other CMS platforms you may need to consult their documentation.
- Look through your CMS pages, posts, static blocks (for Magento), template files, and anything else for improper links that need updating. Some links are generated by your CMS, but may generate the wrong URL. For instance, if a URL in a Magento CMS editor is “{{unsecure_base_url}}example.html, then it should be a relative link, such as “/example.html”
- The next step for Magento users: Login to the backend and go to System -> Configuration -> Web -> Secure to verify the settings are correct:
- Base URL (ends in a slash): Your HTTPS URL, such as https://example.com/
- Use Secure URLs in Frontend: Yes
- Use Secure URLs in Admin: Yes
For WordPress users: I will defer to Yoast’s instruction for this, which can be found here. Essentially, you will need to change the website URL, add some code to force HTTPS in the admin area, and perhaps, install thisplugin. Because WordPress site’s vary so much in their cacheing plugins, look for help from your plugin’s documentation.
Step 5. Setup 301 redirects from HTTP to HTTPS or consider HSTS
For Apache-based websites, to redirect all incoming traffic, say from old Google links or dated links on other sites, setting up a redirect for all HTTP requests to be HTTPS can accomplished fairly easily. Here is some code to add to the top of your .htaccess file in your root folder:RewriteEngine On
RewriteCond %{HTTPS} off
RewriteRule (.*) https://%{HTTP_HOST}%{REQUEST_URI} [R=301,L]
Once that is in there, test thoroughly that your website is still functional and that any request made to your site is redirected to an HTTPS URL.
If you are the type that wants to be on the forefront of technology standards and does not worry about affecting a handful of users, HTTP Strict Transport Security (HSTS) is for you. A guide can be found here with steps for setup. HSTS is a way to force all connections to be HTTPS—it essentially acts in the same way as the redirect mentioned above, but in a standardized way. Unfortunately, Internet Explorer has yet to implement a solution, but most other browsers are already up to speed. In the future, HSTS will probably be standard for reputable websites.
Step 6. Conclusion
Migrating your site to HTTPS is a bit of a task, but luckily there are a lot of resources out there to help. Google has even put together a guide on their recommended process. With all the online help, there really is not a good excuse for lacking HTTPS. With a bit of time and $10 a year, any site can be converted.Here at Elevated we work with clients to convert their websites, both old and new, into HTTPS versions. It’s a process that we enjoy, because it gives lasting value to any company’s online presence. One of our more recent converts is Earthlite Massage Tables, which has continued to see success with their recent switch, this year, to full HTTPS (they are running Magento).

